Love These Stamp Images by Stacey Yacula for My Favorite Things

I just had to buy the Warm & Feathered Hugs stamp set and dies from My Favorite Things.  The images are simply adorable.  This set has 3 owls that are dressed for winter, so I thought I’d better make some cards before the winter season is over.

My Empty Nest Creations Card using MFT Warm & Feathered Hugs stamp set

I started by stamping the darling owl images onto Bristol paper using Versafine Onyx Black ink.  My Zig brush markers hadn’t been used in a while, so I pulled those out to color the owls.  After they dried, I die cut the owls using the matching dies.

The background was created by masking off the bottom left corner for my snow hill and ink blending the rest using Broken China, Salty Ocean and Blueprint Sketch Distress Oxides.  Using a black fine tip marker, I drew the hill edge and, once again, pulled out my Zig markers to give the snow a bit of definition with the light blue marker.  I made a slight shadow for the owl/sled using some cool gray Copic markers.  I heat embossed the sentiment from Hero Arts Made with Love stamp set.  Before placing the owl on the card front with foam tape, I added some falling snow using a white gel pen.  I die cut the card front with the Avery Elle Wonky Stitches die and attached it to a Neenah Solar White 110# A2 card base.

Glad you stopped by!

Computer Signature

First Valentine Card Using Poppystamps Inlay Heart Die

I’ve been away from card making for quite a long time.  Life became much more important to my husband and me.  We became grandparents for the first time about a month ago (6 weeks early) to twins—a boy and a girl.  We are beyond blessed!  Life certainly is good.

After being away for so long, I kind of lost my creative mojo.  My husband has been trying to get me into my craft room just to make something because he knows how much I do truly enjoy it.  So…here’s my first stab at a valentine card for 2019.

My Empty Nest Creations Valentine using Poppystamps Inlay Heart Die

I just bought this beautiful Inlay Heart die from Poppystamps, and the Messages for Every Day stamp set from Simon Says Stamp.  Poppystamps dies always cut perfectly, and the sentiments on this SSS stamp set are awesome!

I cut the die on a piece of pink Bazzill card stock (sorry, I don’t know the color name), and then cut it again using a piece of patterned paper from the 6×6 Front Porch paper pad from Pebbles, Inc.  I added a strip of the same patterned paper to the bottom of the pink piece and adhered it to an A2 white card base made from Neenah Solar White #110 card stock.  I placed the single patterned paper heart into the space on the inlayed heart and glued it down.

All that was left was to pick the right sentiment.  As I said before, this stamp set has an incredible selection of greetings.  There were 3 or 4 that would have worked, but I settled on the “I love you so much!” and white heat embossed it onto a piece of dark brown scrap paper that matched the striped paper I used for the heart.  I attached the sentiment strip using foam tape to give it some dimension.

I hope you like it!  Thanks for stopping by 🙂

Computer Signature

I Just Had to Copy This Design…

I am a bit obsessed with Instagram.  There, I said it.  It is the best and quickest way to get inspired by so many incredible card makers out there.  Today, I came across Trina from Phamtastic Design.  If you aren’t following her blog and her Instagram account, you are truly missing out.  She is so incredibly talented.  The reason I am so drawn to her style is it’s not overly complicated.  She makes awesome cards that bright and colorful, but are easy to translate to your own style.

On her blog and Instagram account, she has a stacked penguin card with this incredible rainbow background.  Here’s the link to her blog post.  I just had to use it to make a card today.

MyEmptyNestCreations Rainbow Background Card Using Gerda Steiner Designs Howl Are You? stamp set

I started by stamping this adorable howling dog from Gerda Steiner Designs Howl Are You? stamp set.  After a bit of masking, I colored the dogs with my Copic Markers (I need to do a lot more practicing with my Copic coloring 🙂  To get the sentiment the way I wanted, I had to do something that I’ve avoided doing with any of my stamps—I cut the stamp apart to get the greeting all on one line.  I’m still a bit uncomfortable with it, but if it’s okay with the Jennifer McGuire, it’s got to be okay with me.

Once the dogs were all colored, I pulled out my masks again (I had 3 dog masks) and strategically masked the dogs and the circular ground while I ink blended the background with Twisted Citron, Salty Ocean, Seedless Preserves and Fossilized Amber Distress Oxides.  The perfect finishing touch was adding all of those white snow dots using a white gel pen.

I mounted it onto a top folding A2 Neenah Desert Storm card base and called it done!

I hope you like it (and don’t forget to check out Trina’s blog and Instagram Account)!

Computer Signature

Another Simple Sympathy Card

Unfortunately, when a friend asks for a card from me, it’s quite often been a sympathy card.  I’m pretty sure that I’ve made more sympathy cards in the last year than I ever have in the last 10.  I’ve said before that sympathy cards have always been hard for me to make.  It’s such a personal and emotional thing, that I feel pressure to make it just perfect.  This one came together fairly easily, and I’m really happy with how it turned out.

My Empty Nest Creations Sympathy Card using Concord & 9ths Lily stamp set

I started by stamping the lily from Concord & 9th’s Lily stamp set twice on a piece of purple card stock with Versamark ink, and heat embossing it with Recollections Snow embossing powder.  Using my white Prismacolor colored pencil, I colored in the petals.  The sentiment is from My Favorite Things Brushstroke Expressions stamp set.  I black heat embossed it onto a strip of velum and adhered it onto the purple card front.

To brighten the card a bit, I used a piece of patterned paper from My Favorite Things Black & White paper pad as the backing.  Because I’m kind of hooked on dimension, I used foam tape to attach the purple card front to the card base, and as usual, I added a few black Nuvo drops.

Thanks for stopping by!

Computer Signature

Save

First Halloween Card of the 2018

Halloween is one of my favorite holidays of the year.  When the kids were young, we had the best decorations on the block.  Unfortunately, now that we’re empty nesters, my Halloween decorating mojo has taken a little bit of a downward turn.  I’m going to have to work on that a bit this Halloween season.

When going through some of my older crafting supplies, I came across a punch that I had never used..the EK Success Jack o Lantern punch.  What better place to start on my first Halloween card of the year.

My Empty Nest Creations EK Success Jack o Lantern punch Halloween card

I started by punching a piece of 4×5 1/4 ” black card stock at various angles.  I was a bit limited as to where I could use the punch, but I fiddle around a bit to get the best coverage.  I knew that I wanted the depth of adhering this piece with foam tape, so I had to do some quick measuring to get the colored inset pieces on the black card base in the right spots.

Jack O Lantern Halloween Card 2 IMG_2122After attaching the card front to the card, I felt that the inset pieces needed a bit of extra help.  I started by using a white gel pen to create a bit of highlights, and then added some Wink of Stella glitter pen to each piece (see photo).

For the sentiment, I cut the “happy” out of light green card stock using the Crafty Cutts Happy die.  I didn’t have a good Halloween stamp, so I simple hand wrote it on a piece of velum using an embossing marker, and black heat embossed it.  Once everything was done, I added a few Nuvo drops to finish it off.

Happy Halloween!

Computer Signature

My First Floral Scene Card

I don’t know about you, but I struggle to create those adorable scene cards that are so popular these days.  Obviously, I don’t have all of the stamps/dies that card makers use to create these complex scenes, but I certainly have enough to work with to make a simple scene.  I decided to give it another try.

My Empty Nest Creations Simple Floral Scene Card

I started by making a very simple ink blended background using Broken China, Twisted Citron and Peeled Paint Distress Oxides.  For the clouds and sun, I pulled out my never used Gina Marie Designs nature set.  I didn’t want the clouds to disappear in the sky, so I inked the edges with the Broken China Distress Oxide ink pad.  To give the clouds a bit of dimension, I adhered one of the small clouds with foam tape.

My Favorite Things Doodle Blossoms stamp/die set has been on my wishlist for a very long time.  I finally bought them and knew that they’d be perfect for this card.  I stamped the flowers and one set of stem/leaves and colored them with Copic markers.  To give the flowers a bit more detail, I used a white gel pen.  For the other two stems/leaves, I used Paper Smooches Best Buds and Simon Says Stamp Best Mom Ever stamp sets.  I attached the flower blossoms with foam tape to give the scene more dimension.

All that was left was the sentiment.  Inspired by Stamping’s Magnolias stamp set had the perfect greeting.  I heat embossed “Live Life in Full Bloom” with black embossing powder and called it done.

I hope you like it!

Computer Signature

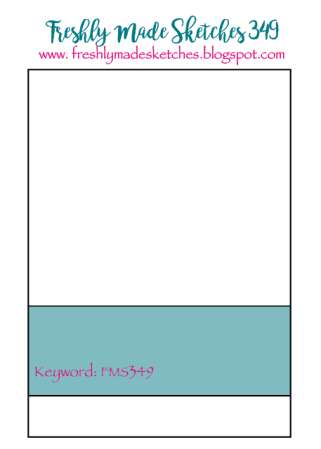
My Entry for Freshly Made Sketches #349

This week’s Freshly Made Sketches sketch is very basic.  I love that it provides a simple jumping off point and leaves you with a chance to interpret it many ways.

FMS Final 349-001

For this card, I decided to pull out some of my older stamps and dies.  Every now and then I like to dig through my supplies and pick a few items out that I haven’t used in a long while.  Quite often, I find myself only focusing on the bright, shiny new stamps and dies that I want to add to my collection and forget about the older ones that are still awesome, too.

My Empty Nest Creations Hero Arts Floating Blossoms Thank You Card

I started by stamping the Hero Arts Floating Blossom background stamp onto a A2 size piece of Bristol card stock using Memento Tuxedo Black ink.  The flowers were colored with Copic markers (very basic…very little color blending or shading).  To make them pop a bit and give a little shadow, I outlined each of the flowers with a few cool gray Copics.  To define the image better, I also outlined each of the flowers/leaves with a fine tip black Sharpie.

The thank you greeting was cut from black card stock using the Die-Versions Thank You Express Edge die.  I thought that the card needed another little bit of contrast, so I cut a strip from my favorite patterned paper, My Favorite Things Black & White Stripe pad, and added it to the bottom.

After adhering the card front to my A2 card, I thought that it needed just a little something more, so I used my Wink of Stella glitter pen to give the flowers some sparkle (unfortunately, this shows in the photo as more of a white mess on some of the flowers…trust me, they are glittery in person 🙂

Thanks for visiting!

Computer Signature


Save

OCC Simply Watercolor Day 5

As I said in my previous post, I’m absolutely loving this online class.  It has given me a lot more confidence in a medium where I had none.  I’ve always loved the watercolor look, but I was never able to get it for myself.  My attempts always looked forced and not “free flowing” enough.  Kristina Werner is such an incredible artist, and in this class, she’s able to give us all a few pointers that have made all the difference for me.

Here’s my Day 5 assignment.  I’m pretty happy with how it turned out.  I hope you like it, too.

OCC Simply Watercolor Day 5 Floral Banner Miss You Card

This watercolor technique was so much easier than I expected.  The wonderful thing about it, too, is that those black outlines tend to hide a few of the small problem areas.  This class has given me just the push I needed to experiment more with my watercolors, and that makes me so happy 🙂

Thanks for stopping by!

Computer Signature

Online Card Classes Simply Watercolor Day 4

I don’t usually take online card classes, but I’ve always been impressed with the classes that Online Card Classes has offered.  Kristina Werner is teaching their latest class called Simply Watercolor.  I decided to take this class because watercolor has never been simple to me, and I knew that Kristina was a wonderful teacher (she’s incredibly talented, too!)  I have to admit that I’m pretty behind on the homework, but I’m truly enjoying just watching the videos and seeing Kristina at work using watercolors.  Just to show you are awesome she is, she is using all different price point watercolors.  It is just amazing to see what she creates with an 8 dollar set of Crayola paints.

Day 4’s lesson was about Landscapes & Nature.  Here’s the card I created after viewing this lesson…

OCC Simply Watercolor Landscapes & Nature assignment by My Empty Nest Creations

I forgot to mention that no stamps or dies are used on any of the cards in this class.  Everything is hand painted, hand drawn and hand lettered.  Sometimes I get stuck making a card because I don’t have just the right stamps.  I never even think about hand lettering a greeting or hand painting a scene.  This class has definitely made me think outside my box, and I’m truly loving it!

You should definitely check it out 🙂

Computer Signature

A Quick & Easy Card for a Friend

I needed a card for a friend, and I needed it pretty quickly.  I hadn’t made a card in quite a while (home improvements are top of my list lately).  I decided to use one of my “go-to” card designs.

My Empty Nest Creations Technique Tuesday Wild Clover Card

I started by masking off a rectangle on the right side of a 4 x 5 1/4″ piece of Bristol paper.  Ink blending  was definitely in order, so I pulled out some of my favorite Distress Oxide inks.  They just blend so beautifully.  I used Fossilized Amber, Twisted Citron and Broken China.  I let that dry for a few minutes before I stamped Technique Tuesday’s Wild Clover on top in Versafine Onyx Black ink.  The sentiment is from the same stamp set.

Because of the right-sidedness (is that even a word) of this piece, I knew that I also wanted to adhere it to the right side of a vertical, top folding A2 card base.  To balance the black stamped images, I matted the stamped piece with black card stock and then attached it to the right side of my card base.

That’s all there is.  I told you it was a quick and easy card.

Computer Signature